start somewhere I am going to assume you chose to use the size of pipe I recommended above
(and found, which may be hard in some places ). (pipe chart at end of this booklet)
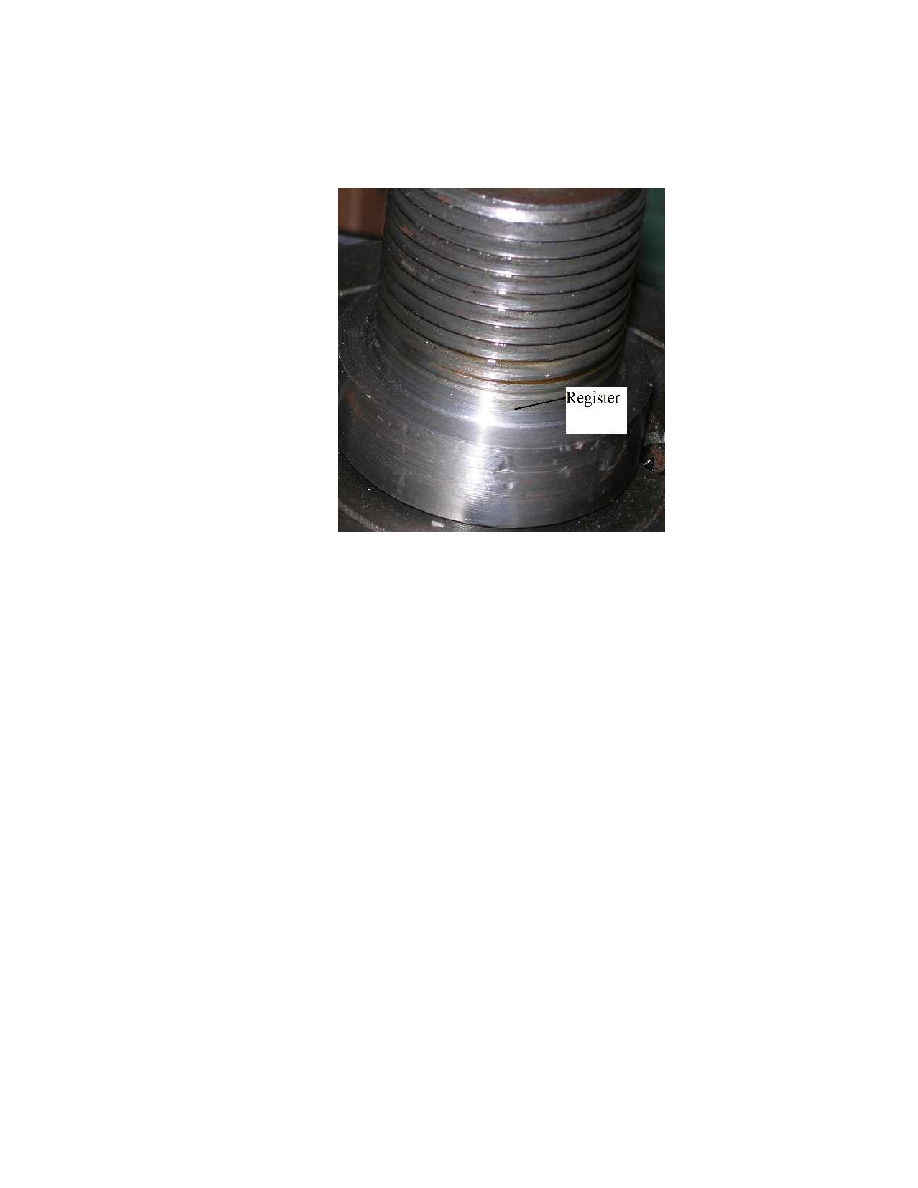
This picture (below) shows the critical spindle "nose" that you would thread 2 1/4" 8 threads per
inch to match a chuck backplate.
NEXT comes the important part!
Look carefully at the little section
between the thread and the spindle
shoulder. It is called the "register".
The register area centers the
backplate on the spindle when the
backplate is screwed on far
enough to hit the spindle shoulder.
This is extremely important since
it means that the spindle can be
threaded on another lathe and still
be accurate on your
MultiMachine. After you get your
machine powered up and the
bearings adjusted, take light cuts
on the register and shoulder
surfaces until the chuck backplate
is a "wringing" (gently screwing the backplate forwards and backwards until it works it's way
over the register) fit. The chuck backplate will then be a custom fit on the MultiMachine itself.
The spindle threads don't center the chuck, the register and shoulder do! After this careful
fitting is done, take a cut (machine the surface) on the chuck backplate to make sure it is running
true before you bolt on the chuck. The MultiMachine newsgroup "files" section has an excellent
article about mounting chucks.
How long should this shoulder be? In this case, at least an inch and a quarter. If you eventually
want to be able to cut threads, add another inch to this for a timing gear pulley that will drive a
thread follower device that is currently being developed. Remember that a 1/2" plate bolts to the
front of the block and that you will need additional shoulder space for set screws etc.
After the shoulder comes the space for the front roller bearing.
The big spacer between the bearings takes the place of the bicycle hub and must be carefully
made and and fitted so that the roller bearings are absolutely parallel. The spindle can be slightly
undercut the same length of the spacer to make it easier to press the front bearing on.
The inner roller bearing should be a slightly (polish with emery cloth) looser fit on the spindle to
make it easier to to adjust. If you over-tighten this bearing then slightly back off the adjustment
screws, run the machine and let it "shake" lose a little.
The adjuster is the really BIG MultiMachine secret! It is not the usual nut on a threaded
spindle. It is a combination of two common industrial devices. Dave Gingery used the idea on his
horizontal milling machine arbor and I added the clamp bolts to avoid having to pock mark the
spindle with set screw marks. This design is a wonderful idea that can be used many times in
19